Showing posts with label crafting. Show all posts

Tuesday, May 7, 2013

Summer Love : Documenting the Sunny Days of 2013


This is it. This is the year! Summer after summer, I fail to document all of those special little moments that make life so memorable. Not this year, my friend. From May 1st until August 31st, I'll be snapping photos using my phone and my Nikon in an attempt to document the summer of 2013.

I purchased an adorable turquoise and kraft album from Michael's Snap brand that mimics the style of Project Life with a little dose of Smash books. It's a small binder that can be filled with plastic inserts. The inserts have a variety of pocket styles, and the binder itself came with an assortment of styles. I also purchased refills that have lots of small pockets.

I'll be printing my photos off and using scrapbooking products to create a cheery little coffee table book that documents our summer. I chose to use turquoise, yellow, white and pink as my main colours, but anything beautiful goes. I hope to include ticket stubs, menus, napkins and labels of fun times as well. I'll be creating a spread a week and sharing them here on Polka Dot Soup.

Thanks to leftover birthday gift cards, I was able to rummage through Homesense's assortment of scrapbooking products to find items that suit the style of the summer book. Lots of Amy Tangerine products like dimensional and fabric stickers, as well as a pad of summery papers in turquoise and orange. Perfect! Leftovers from my own crafty stash will round out the items that I use in my summer book. Here's a look at some of the crafty goodness I'll be using:


Fun, right? I hope that this little peek inspires you to do the same, or a similar project. No more leaving photos on the camera, phone or computer. It's time to develop them and share their beauty with others! I can't wait to get my first batch of photos developed and create my first spread in my summer book.

Happy Tuesday!


Tuesday, January 8, 2013

Crafting in January


As soon as Christmas gets all wrapped up - presents unwrapped, decorations boxed up, the tree thrown out, the food all eaten - I get itching to craft every year. Call it nesting, winter hibernation, shack-happy, whatever, but all I want to do is create with my hands. There is an innate desire in me that screams "let me craft!"

I chose four colourful projects that are from my DIY Pinterest board to make this month. The monocromatic winterscape outside makes the colours stand out even more. I've had each of these projects pinned for a long time, and now that I'm writing down that I'm making them, maybe I'll get committed :)

The first project? A pencil stand from an old chunk of wood. I have lots of art supplies that need to be organized, and this free craft project would be both quick and useful. This supply stand could be used in countless ways - pencils, pencil crayons, markers, paint brushes, make-up brushes, you name it. You get to use hand-tools while making the stand as well... can it get any more fun?

I've had lots of vintage fabric scraps saved over the past few years. The pillowcase project would make great use of those vintage fabrics, and bring cheery comfiness to the bed linens. I don't think that I'll tackle the crocheted edge, but bright colours? That I can manage.

The third project is one that I have wanted to do for quite some time. I may paint Mason jars with bright colours, but chances are I'll use a metallic paint or two for this go-round. Timeless storage solutions that are inexpensive (read: free) and easy rock my boat. Just need to grab a jar or two from the recycling bin. Eco-friendly at its finest.

The last project is one that I will tackle on a smaller scale. Colourful paper flowers would be right at home in our rearranged living room. I'm getting tired of some of the darker artwork that's displayed in our home (I may list some pieces on Kijiji) and the paper flowers will be nice free placeholders until I decide what I want to do.

How about you? Are there any craft projects that you are tackling this month? Let me know if you think of any cool ideas! I'm always up for something new and cheap.

(Sources: Image 1; Image 2; Image 3; Image 4)

Happy Tuesday!


Tuesday, March 6, 2012

Monogram Art


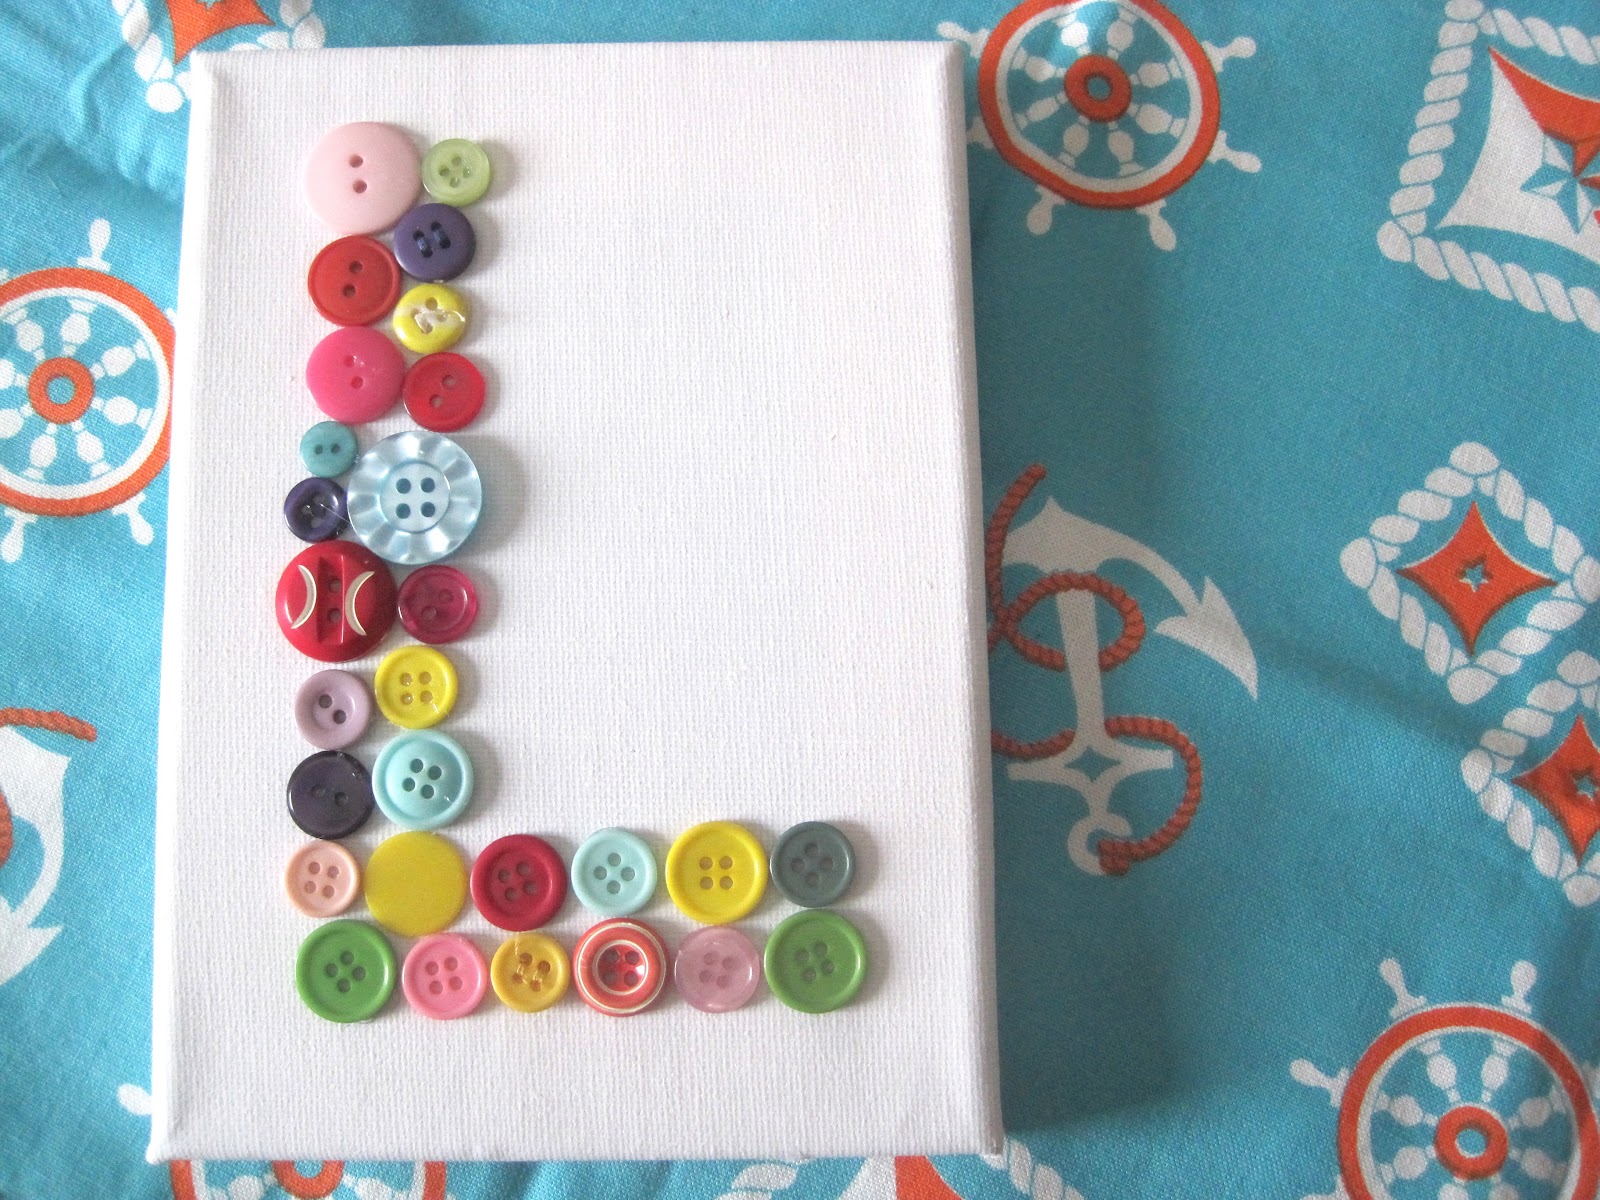
Friends of ours had their first baby girl last week! I wanted to give her something handmade and create something especially for her - since I know her mama's crafty and would appreciate it. (You know what I mean? Some people just don't get handmade.) I knew that I wanted to incorporate buttons - because you know I love my button collection. I had a teensy little blank canvas laying around, too, about 4" x 6". 

Here's what I came up with:


A little monogram art! An L for the baby's name, Lara (cute name, eh?). I left the canvas white because I really wanted the buttons to pop. I grabbed a handful of my most colourful buttons, some with thread, some without, and started creating. I played around with the layout until I came up with the size and colour placement of the buttons that I wanted. I threw a few larger buttons into the mix, too, just to break up the pattern a little bit. 


Once I had decided on how I wanted the buttons to lay, I heated up my trusty glue gun and got glueing. For a quick project  - about 20 minutes, start to finish - I think it turned out pretty cute! I love the way that the canvas looks with the bib that I ordered from Etsy:


I hope her mama likes the little present! 

Happy Tuesday!

+ + + 

I sought the Lord, and He heard me,
and delivered me from all my fears.
Psalm 34:4

Thursday, February 23, 2012

Little Paint on the Prairie


Do you guys remember this painting that I made a few months ago? Well, I couldn't get comfortable with it. It was just a super quick project and the lines weren't straight. Every single time I try to tape and paint, the paint bleeds. No fun. The colours weren't really working for me either - they'd work in an outfit, or in a room that I was starting from scratch, but in our existing decor? Umm, nope. Soooo... I started from scratch.


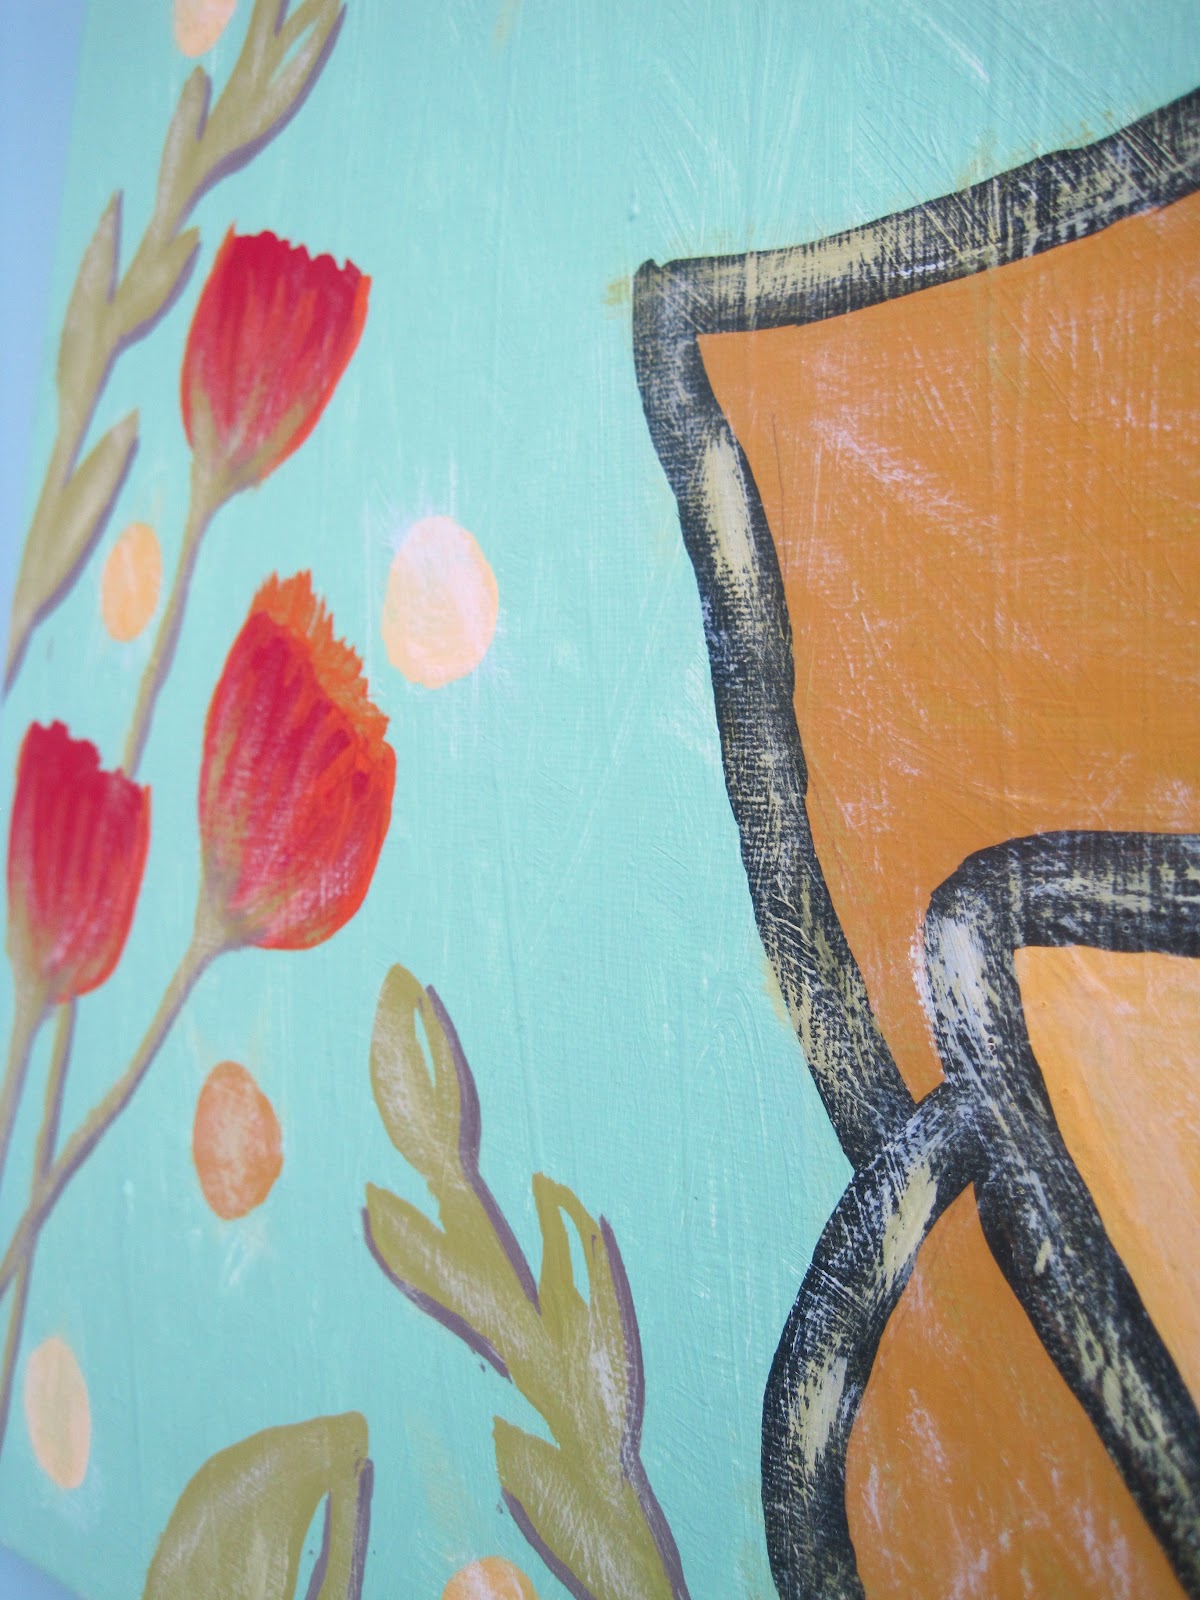
I used the same canvas and got my some loose inspiration from a piece of fabric. I adored the colour combination - I mean, mint green, mustard, and brights? Sign me up! I got to use some fun new Martha Stewart paint that I got for Christmas, too. (As a side note, my colours and lighting are all over the place. I'm no photographer, alright? The colours are most accurate in this photo and the last photo in the post.) Here's what I ended up with:


I had so much fun! I took my time and painted over the course of a week, enjoying every moment. Sometimes I get crafting and lose interest really quickly, but I couldn't wait to spend time on this painting. The colours and imperfection suit me perfectly. Here's a closer look:


I had originally stuck the piece with my other green paintings in our hallway:


... but I'm not sure if I want it in the hallway or not. I do have another painting that I can put in its place. This morning, I moved the painting to a cozy little corner in the living room:


I like it in both places! Our living room really needs more bright items. We have several pieces of furniture that feel dark and heavy, so the colourful painting is a nice addition. I love each time item that we have in our home, but sometimes they just don't work together. I'll give the painting a few days in its new location and then go from there.

I'm off to pick up a few essentials in town (dog food and garbage bags, anyone?), hopefully drop in to say hi to a friend and then it's home on the range for the evening. Man, I love having the winter off! Spoiled! Have a great day!

Happy Thursday!

Friday, January 6, 2012

Project: Crayon


This is a super cute project for any little people (that's children... not actual little people. I know you know what I mean.) that you need a present for. It would make a great favour at a birthday party, a cute stocking stuffer, a gift for your Sunday School class, or a just-beause present for your favourite little someone. It's inexpensive, but useful and cute. For a bigger gift, you could pair the crayons with few colouring books or a roll of art paper.

Here's what you will need:

Crayons
Silicon mould
An oven
(That's it!)

For the mould, you can use a cupcake mould or an ice cube one, as long as it's a fairly simple design. I used a star-shaped ice cube mould that I got at a yard sale a couple of years ago. See? It pays to go to yard sales!


Before you begin, peel all of the wrappers off of the crayons. It's the biggest pain in the butt part of the project, but there's no getting around it. I'd use the Crayola brand, too... they're at the dollar store (so they're cheap!), and the no-name brands are usually crap (remembering back to elementary school days). Pre-heat your oven to 250. Chop up the crayons and place in the mould, there's no need to grease them. You can mix the colours or make each shape one colour, it's up to you. Place in the oven for about 15 minutes. Check on the part way through and fill the mould up some more, those bad boys really melt down. Take out of the oven, let cool, then pop them out of the silicon mould. Done-skis!


The crayons look cute wrapped in cellophane and ribbon or nicely folded into a piece of tissue. Have some fun with the packaging - that's my favourite part. Since it's a kid-friendly present, make it as bright and cheery as possible. Your little friend will love them! The chunky size is great for toddlers hands, too.


Sorry for the dark and grainy photos, I took this photos right at night before I packaged them up to sent them in the mail. You should totally give this project a try! Let me know how it goes.

Happy Friday - have a great weekend!

Wednesday, December 14, 2011

Sneak Peek

Here's a peek at two projects that I finished this week:


Curious? Stay tuned Thursday and Friday for a closer look!

Tuesday, November 15, 2011

Crafting Itch


I don't know about you, but as the cooler weather starts moving in, I get the crafting itch. I'm dying to get my hands on a pair of scissors, pretty paper, and double-sided tape. Washi tape = bliss. Embellishments and buttons = just too much. I want my table covered in supplies and projects.

I'll be crafting and baking all week, preparing for the Christmas Market that I'm attending on Sunday. Hopefully that'll scratch my crafting itch :) I'm still brainstorming, but I do know that I'll have gift tags, Christmas ornaments, and treats that are freezable, so they can be saved for Christmas. My list will be finalized (and started!) by tomorrow evening, so check back if you'd like to hear more. Maybe I'll even manage an in-progress photo or two.

Have any ideas? Do share!

Happy Tuesday!

Wednesday, May 11, 2011

Scrap Happy


Yay! I took some time to make a scrapbook page. 

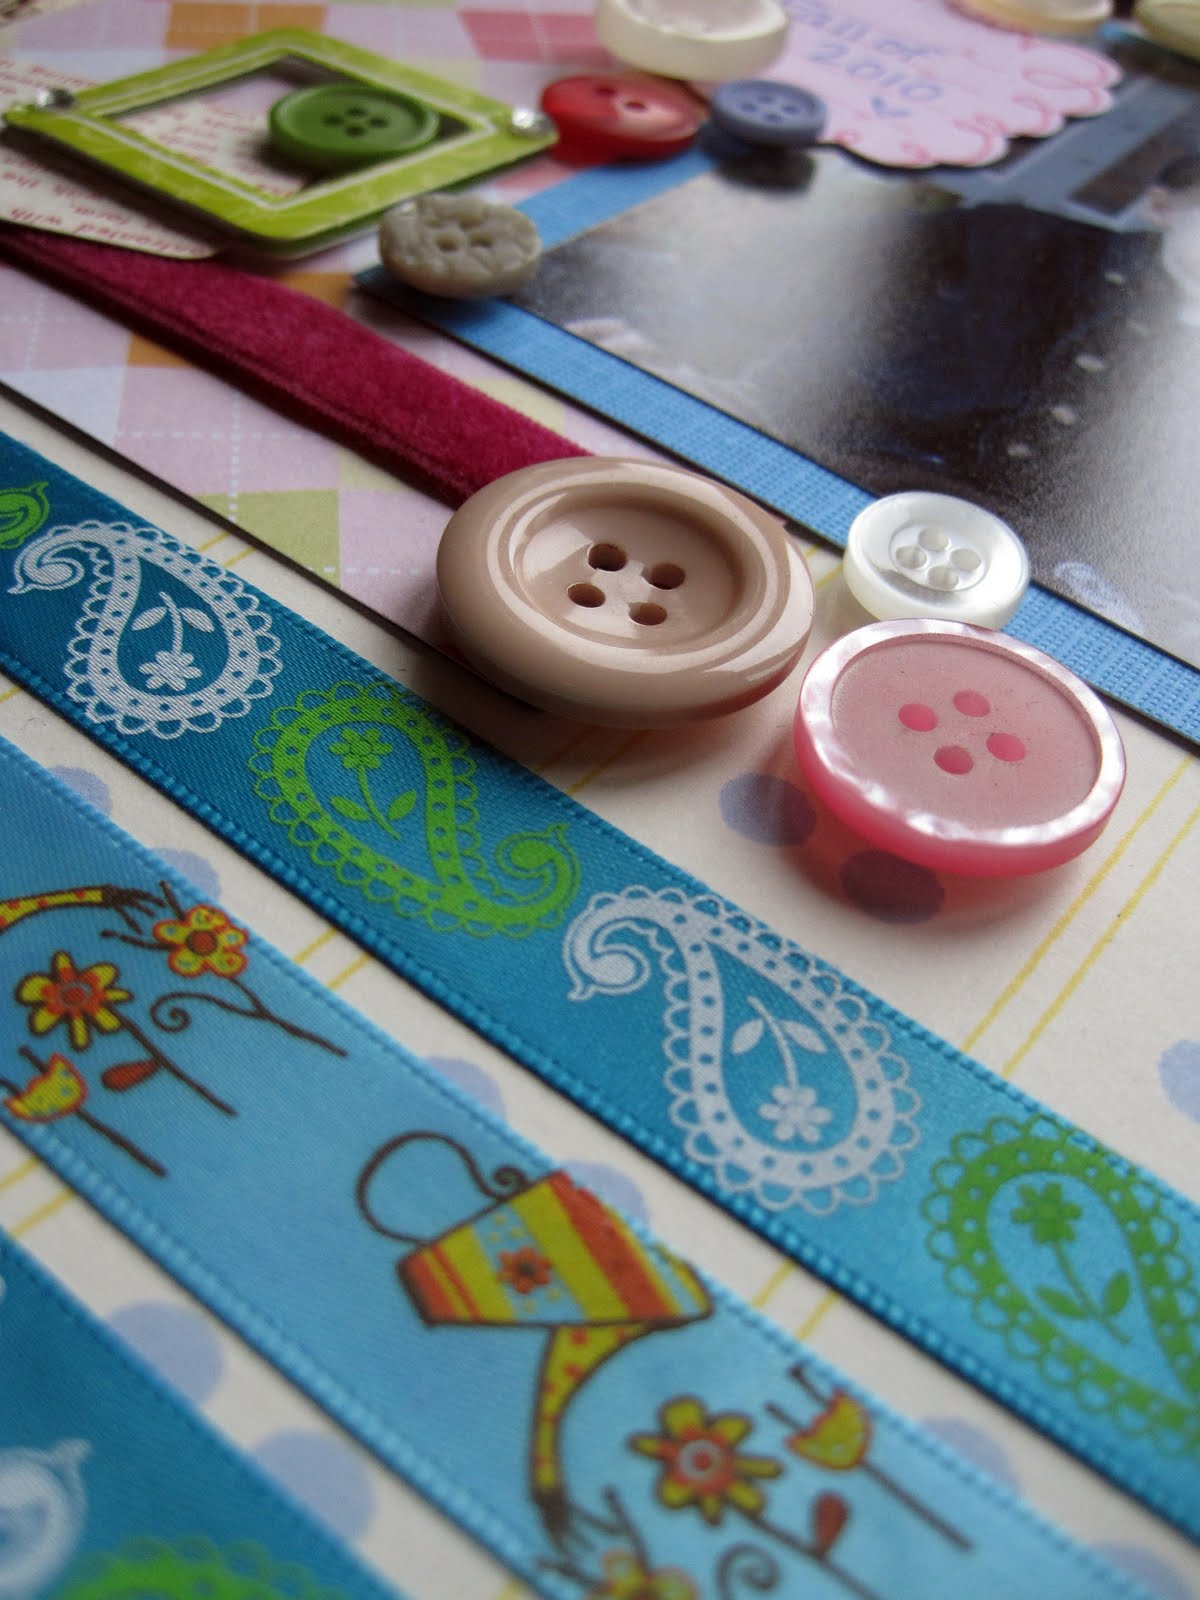
I'm trying to get photos scrapped right away instead of adding them to the piles of photos that I intend to make pages for. This was the photo that we got at Christmastime from my little niece and nephews. I figured it was time to take it off the fridge, and put it in an album. They're the cutest little nuggets ever. I wanted to use bright, cheery colours that weren't too gender specific... and I love me some buttons. I like how the page turned out. 

Here's a close-up of some details:


... and I can't forget about a close up of their sweet little faces:


 I hope to keep the scrapping up - I'm tired of finding stacks of photos and mementos jammed into little crevices throughout our home. I always have the best intentions, but not much in the form of results. Here's to conquering projects!

Happy Wednesday!
(Isn't the week flying by?!)

Monday, May 9, 2011

From Me to You


I made a print for our apartment today that I'm happy to to be able to share with you! I made a list of reminders to help my day run smoothly... it's the "dos" instead of the "don'ts".

There are two different versions - a black and white one, and a brightly coloured rainbow one. Chose your favourite style, download the PDF, and then print on cardstock or plain paper. Pop it on your wall, your fridge, in your car, wherever. You can even give it to some special. Easy-peasy!

I hope that your Monday is extra lovely - let me know what you do with your print!

Daily Mantra - B&WDaily Mantra - Rainbow

Friday, May 6, 2011

A Little Revamp

I painted Mr. Octopus wayyy back in 2008. We had a little painting party at Patrick and Janelle's place, and he was the result. I found him in a stack of unhung photos and prints the other day, and decided to give him a little revamp.

The background was originally white, but since it had been stuck in storage for so long, there were numerous black marks across the canvas. I busted out some green, blue, and white acrylic paint, water, and a sponge brush, and brightened Mr. Octopus up. Now he's perched beside our washroom. He's a nice bit of colour in our teensy hallway!


Happy Friday!

Tuesday, March 15, 2011

I'd like to share...


In an attempt to pare down, I've been trying to reassess my craft supply stash. 

I don't know why we all like to hoard our supplies so much.
Since I don't have a craft room anymore, my stash is crammed into our coat closet - and I need to make room to take out our warmer weather shoes and coats.
I don't understand what all of those supplies are still doing in my possession.
What, am I going to have a scrapbooking emergency?! Not much chance of that.
Why not spread the wealth with my readers?

If you would like some buttons, I would love to share with you! I have them organized by colour, if there is a certain combination that you would like... or I can do a goody grab bag as well. Drop me a line at littleohme(at)hotmail(dot)com.

Friday, March 11, 2011

A Present for Sam

Do you remember me mentioning Sam's birth last Friday? He's a special little boy that was born last week to our friends Janelle and Patrick. Please pray for them as everything gets finalized. (They adopted him.)

I wanted to create something for our little honorary nephew Sam. We've been sending care packages, but we wanted the main present to be special. Handmade is always the best option. Now that the package has arrived safe and sound, I'm so excited to share his gift with you! Here's what I made:


It's a cloud mobile! I wanted to make something neutral, so J + P can use it for future kiddos as well. It's made out of a cream-coloured fleece, and it is suspended with clear thread from a wooden ring. It could fit into any decor, and doesn't have to be a baby mobile, either. I had so much fun making it!

I hope that you have a lovely weekend - our is starting out a little awkward, but we have a lot of plans. We're hoping to hang out with friends tonight, spend tomorrow morning with our niece, and then I'm going to a ladies' Bible study and potluck. It should be fun!

Happy Friday!

Thursday, March 3, 2011

Scrap Happy

When I was sorting through box after box of crafting supplies last week, I found a stack of photos that I had been meaning to scrapbook before we moved. Some were recent, but quite a few were not so current. It was time to work those photos into some pages!

Last night, during a quiet evening in, I seized the opportunity to have a craft night. A few scattered photos, random supplies, bits, and bobbins to use up, and older paper that's ready to be used equals a finished project. Nothing fancy, but better in an album than in a stack of papers.
I'm a happy girl!


Monday, February 7, 2011

Commission.


Isn't it wonderful how things fall into place?
After posting last week about the series of paintings that I'm selling, my friend contacted me and wanted a commissioned piece. She loved the "love" painting, but need it in different colours. I tackled it last night, and I'm pleased with the results:

... and a closer shot:

I hope that she loves it! 

Let me know if there is anything that you are interested in - I'll try to make it happen! I can't wait to get my shop opened again!

Friday, February 4, 2011

Card It. Again.

Hello friends!

I finished up the Valentine's Day cards for my pals... and I thought that you might like a peek. 

I've been trying to use up my scrap box (a shoebox full of bits of paper) so that the poor little box can have a fresh start. These cards are made entirely from those bits and pieces. I did bust out an unopened package of 3-D stickers, though :) They had to be a little bit festive. The cards aren't necessarily "Valentine's Day appropriate", but they are all girly and cute... that's what matters :) 

Take a look...


I'm trying my very best to not purchase new scrapbooking supplies. Since we've moved, I've become more aware of all of the little supply stashes I had everywhere. I purchased some items to use for my Etsy update last night, but other than that, I'm going cold-turkey. I have a little problem with hoarding supplies for the perfect project - I need to buckle down and make every project the perfect one :)

Have a lovely Friday!

Thursday, February 3, 2011

Scrap It.


My friend Ciela got married over the summer months. We received a thank-you note and a wedding photo on Tuesday, so I decided to be super efficient and scrap it right away :) It really is the best way - I have a box or two of things that I've been meaning to make pages with. Umm... make that two or three. Those things include our honeymoon. Sad, I know... three and a half years later.  

Anyway... here's the page. Also, I took a few detail shots for your viewing pleasure...


Ciela and Vince also sent me my photo booth picture from the wedding reception. (Daniel had to work, so I was dateless.) It turned out pretty decent, if I do say so. The items from the box of fun accessories ended up going fairly well with my outfit...


Happy Thursday!
Related Posts Plugin for WordPress, Blogger...